
How to Get the Most Out of Your Real Estate Listing Photography
When it comes to selling a home, first impressions matter. Most buyers start their search online, and the quality of your photos can make or break their interest. At NTP 2 Photography, we know how crucial it is to showcase your property in the best light. From staging to professional photography, getting your home ready for its close-up is key to attracting potential buyers.
Here’s how to prepare your home for real estate photography and why using a professional photographer can make all the difference.

Staging Your Home for Success
Staging your home is one of the first steps in getting it ready for photography. A well-staged home looks more inviting and allows potential buyers to envision themselves living in the space. Here’s how you can make sure your home is photo-ready:
Declutter and Clean: Remove personal items and excess furniture to make rooms appear larger and more open.
Highlight Key Features: Arrange furniture and decor to draw attention to unique features like fireplaces, large windows, or built-in shelving.
Add a Touch of Warmth: Simple touches like fresh flowers or a cozy throw can make your home feel more welcoming.
By taking the time to stage your home, you set the stage for beautiful photos that can capture buyers' attention from the moment they see your listing online.
The Power of Professional Photography
While anyone can take pictures, professional real estate photographers bring a level of expertise that can significantly enhance your listing. We use high-quality cameras and editing techniques to make your property stand out. Here’s why it’s worth investing in a pro:
Expert Lighting and Angles: Professionals know how to use lighting and angles to showcase your home’s best features.
Editing for Perfection: Post-production editing can correct minor flaws and enhance the overall appeal of your photos.
First Impressions Matter: With most buyers starting their search online, stunning photos can lead to more showings and faster offers.
Remember, many buyers are making decisions just from photos alone—so make sure your property is putting its best foot forward.
Why Good Photos Make a Difference
In today’s market, many buyers are ready to make an offer based on photos alone, even before they set foot inside the property. That’s why investing in quality photography is so important. When your home looks its best online, you’re more likely to attract serious buyers who are ready to act.
We are dedicated to helping you present your property in the most appealing way possible. We know what it takes to capture photos that sell, and we’re here to make sure your listing stands out in a crowded market.

Get the Best Shots with NTP 2 Photography
Making sure your home is staged and professionally photographed can significantly increase its appeal to buyers. At NTP 2 Photography, we combine staging advice with expert photography to help your property shine. Let us help you make a lasting impression with photos that capture the essence of your home. Book a session today.

Boost Sales with Real Estate Photography: Sales Stats
High-quality photography can make all the difference when it comes to listing a property on the market. At NTP 2 Photography, we know that great photos can significantly boost your property’s appeal and, ultimately, your sales. Investing in professional real estate photography is not just about making it look good; it's about driving sales and attracting serious buyers.
Professional real estate photography highlights the best features of a home, making it stand out in listings. Our team uses the latest techniques and equipment to capture stunning images that showcase properties in the best light, helping to attract more potential buyers and sell properties faster.

Why Professional Photography Matters
Good photography can be a game-changer in real estate. Studies show that listings with professional photos get more views and, often, higher offers. This isn’t just about aesthetics; it’s about creating a visual story that helps buyers envision themselves in the home.
Increased Views: Listings with high-quality images get more clicks
Higher Sale Prices: Homes with professional photos sell for more
Faster Sales: Properties with great photos sell quicker than those without
Our team at NTP 2 Photography understands what buyers are looking for and how to highlight those features effectively.
How We Enhance Photos With > Professional Editing
Key Stats on Real Estate Photography
The numbers don’t lie—professional photography has a direct impact on sales:
93% of buyers start their search online, making first impressions crucial
Listings with high-quality photos receive 47% higher asking prices per square foot
Homes with professional photography sell 32% faster than those with amateur images
These stats clearly show the importance of investing in quality photography to enhance your listings.
Our Approach to Real Estate Photography
At NTP 2 Photography, we tailor our approach to meet the specific needs of each property. Our process includes:
Initial Consultation: Understanding your goals and the unique aspects of your property
Photography Session: Using top-notch equipment and techniques to capture stunning images
Editing and Enhancement: Professional editing to ensure each photo is perfect
Delivery: Providing high-resolution images ready for your listings and marketing materials
This comprehensive approach ensures that your property looks its best and stands out in the market.

Check Out More > HERE
Maximize Your Sales with NTP 2 Photography
Professional real estate photography is a smart investment that can lead to higher sales and faster turnaround times. Our team at NTP 2 Photography is dedicated to helping you achieve the best results with stunning images that capture the essence of your property.
Reach out to us today to find out more about how our photography services can boost your real estate sales and make your listings shine.

What Makes a Shot Look Professional - Field of View's Effect on a Scene
Have you ever noticed that some photos just look more professional than others, even if they're taken of the most ordinary subjects? Often, the secret isn't in expensive gear but in understanding and using the field of view (FOV) effectively. FOV changes how a scene is captured and presented, impacting the mood, focus, and overall impression of your photos. Whether you're shooting with a DSLR or an iPhone, manipulating the FOV can significantly enhance your images.
If you want to level up your photography, start experimenting with the field of view in your shots.

Understanding Field of View
Field of view is about how much of a scene your camera captures. It's shaped by the lens's focal length and the camera's sensor size.
A wide FOV includes more of the scene, perfect for landscapes or when you need to show a sense of space.
A narrow FOV, on the other hand, brings your subject into tighter focus, ideal for portraits or highlighting details.
Even with an iPhone, you can adjust your FOV. Switching between the standard, wide, and telephoto settings allows you to experiment with different compositions and perspectives without changing your physical position.
Choosing the Right Lens
The lens you choose directly affects your FOV. Wide-angle lenses let you capture broad scenes, while telephoto lenses zoom in for detailed shots. The trick is to match the lens to your vision. Do you want to immerse the viewer in the environment, or isolate a subject against a blurred background?
For iPhone users, tapping into the "1x" or "2x" options simulates changing lenses, offering a straightforward way to alter your FOV and play with composition directly from your phone.
Manipulating Depth of Field
Depth of field (DOF) and FOV are closely linked. A wide aperture (low f-number) creates a shallow DOF, focusing attention on your subject by blurring the background. This technique adds depth to your photos and is a go-to for making your shots stand out.
iPhones and many other smartphones offer a "Portrait" mode that simulates this effect, blurring the background while keeping the subject sharp. It's an excellent tool for achieving a professional look with minimal effort.

Framing and Composition
Finally, how you frame your shot can make or break its professional appearance. A well-chosen FOV can help balance the elements in your scene, guiding the viewer’s eye to the subject or creating a certain atmosphere. It's about making intentional choices with your composition to tell a story or evoke an emotion.
Remember, achieving a professional look in your photography is about understanding the tools at your disposal, whether that's a high-end camera or the phone in your pocket. Experimenting with different fields of view can transform your shots from ordinary to extraordinary.

ERIC'S TOP 5 TIPS TO PREP FOR REAL ESTATE LISTING PHOTOGRAPHY

I share with many of my closest clients that Real Estate was among the first services that I offered when I launched my business 5 years ago this month. The first listing that I photographed had a offer put in and was accepted within 3 days of going live. The part about that is uncommon is that the offer came from a out of state family that didn't see the house in person only by pictures. Ever since that day I have been doing business with some of those same individuals today. Many realtors will prep their homeowner to get their home ready for the listing photo session but I have noticed there are many areas of the home that are overlooked. That is why I put together my Top 5 Tips to get your home ready for real estate listing photos. Now before I share that it goes without saying that your realtor will prep you for the basics to get your home ready like cleaning, organizing, decluttering, etc.
5.) Check Light Fixtures-Many times fan light fixtures, bathroom vanities and recessed kitchen lights are missed. Make sure that the bulbs are all working and that they are all the same intensity and color temperature.

4.) Cluttered Areas- I share with so many that there is a difference between organized and unorganized areas. Avoid leaving rubber mate totes and cardboard boxes in the home. Use the garage as a place to store those items until after the shoot.

3.)Pet Items- Make sure to stow the pet items like bowls, toys and litter boxes away for the photoshoot.
2.)Driveway and Sidewalk being cleaned- Having the driveway and sidewalk cleaned beforehand is a very fast and small investment to make to give your property a facelift.
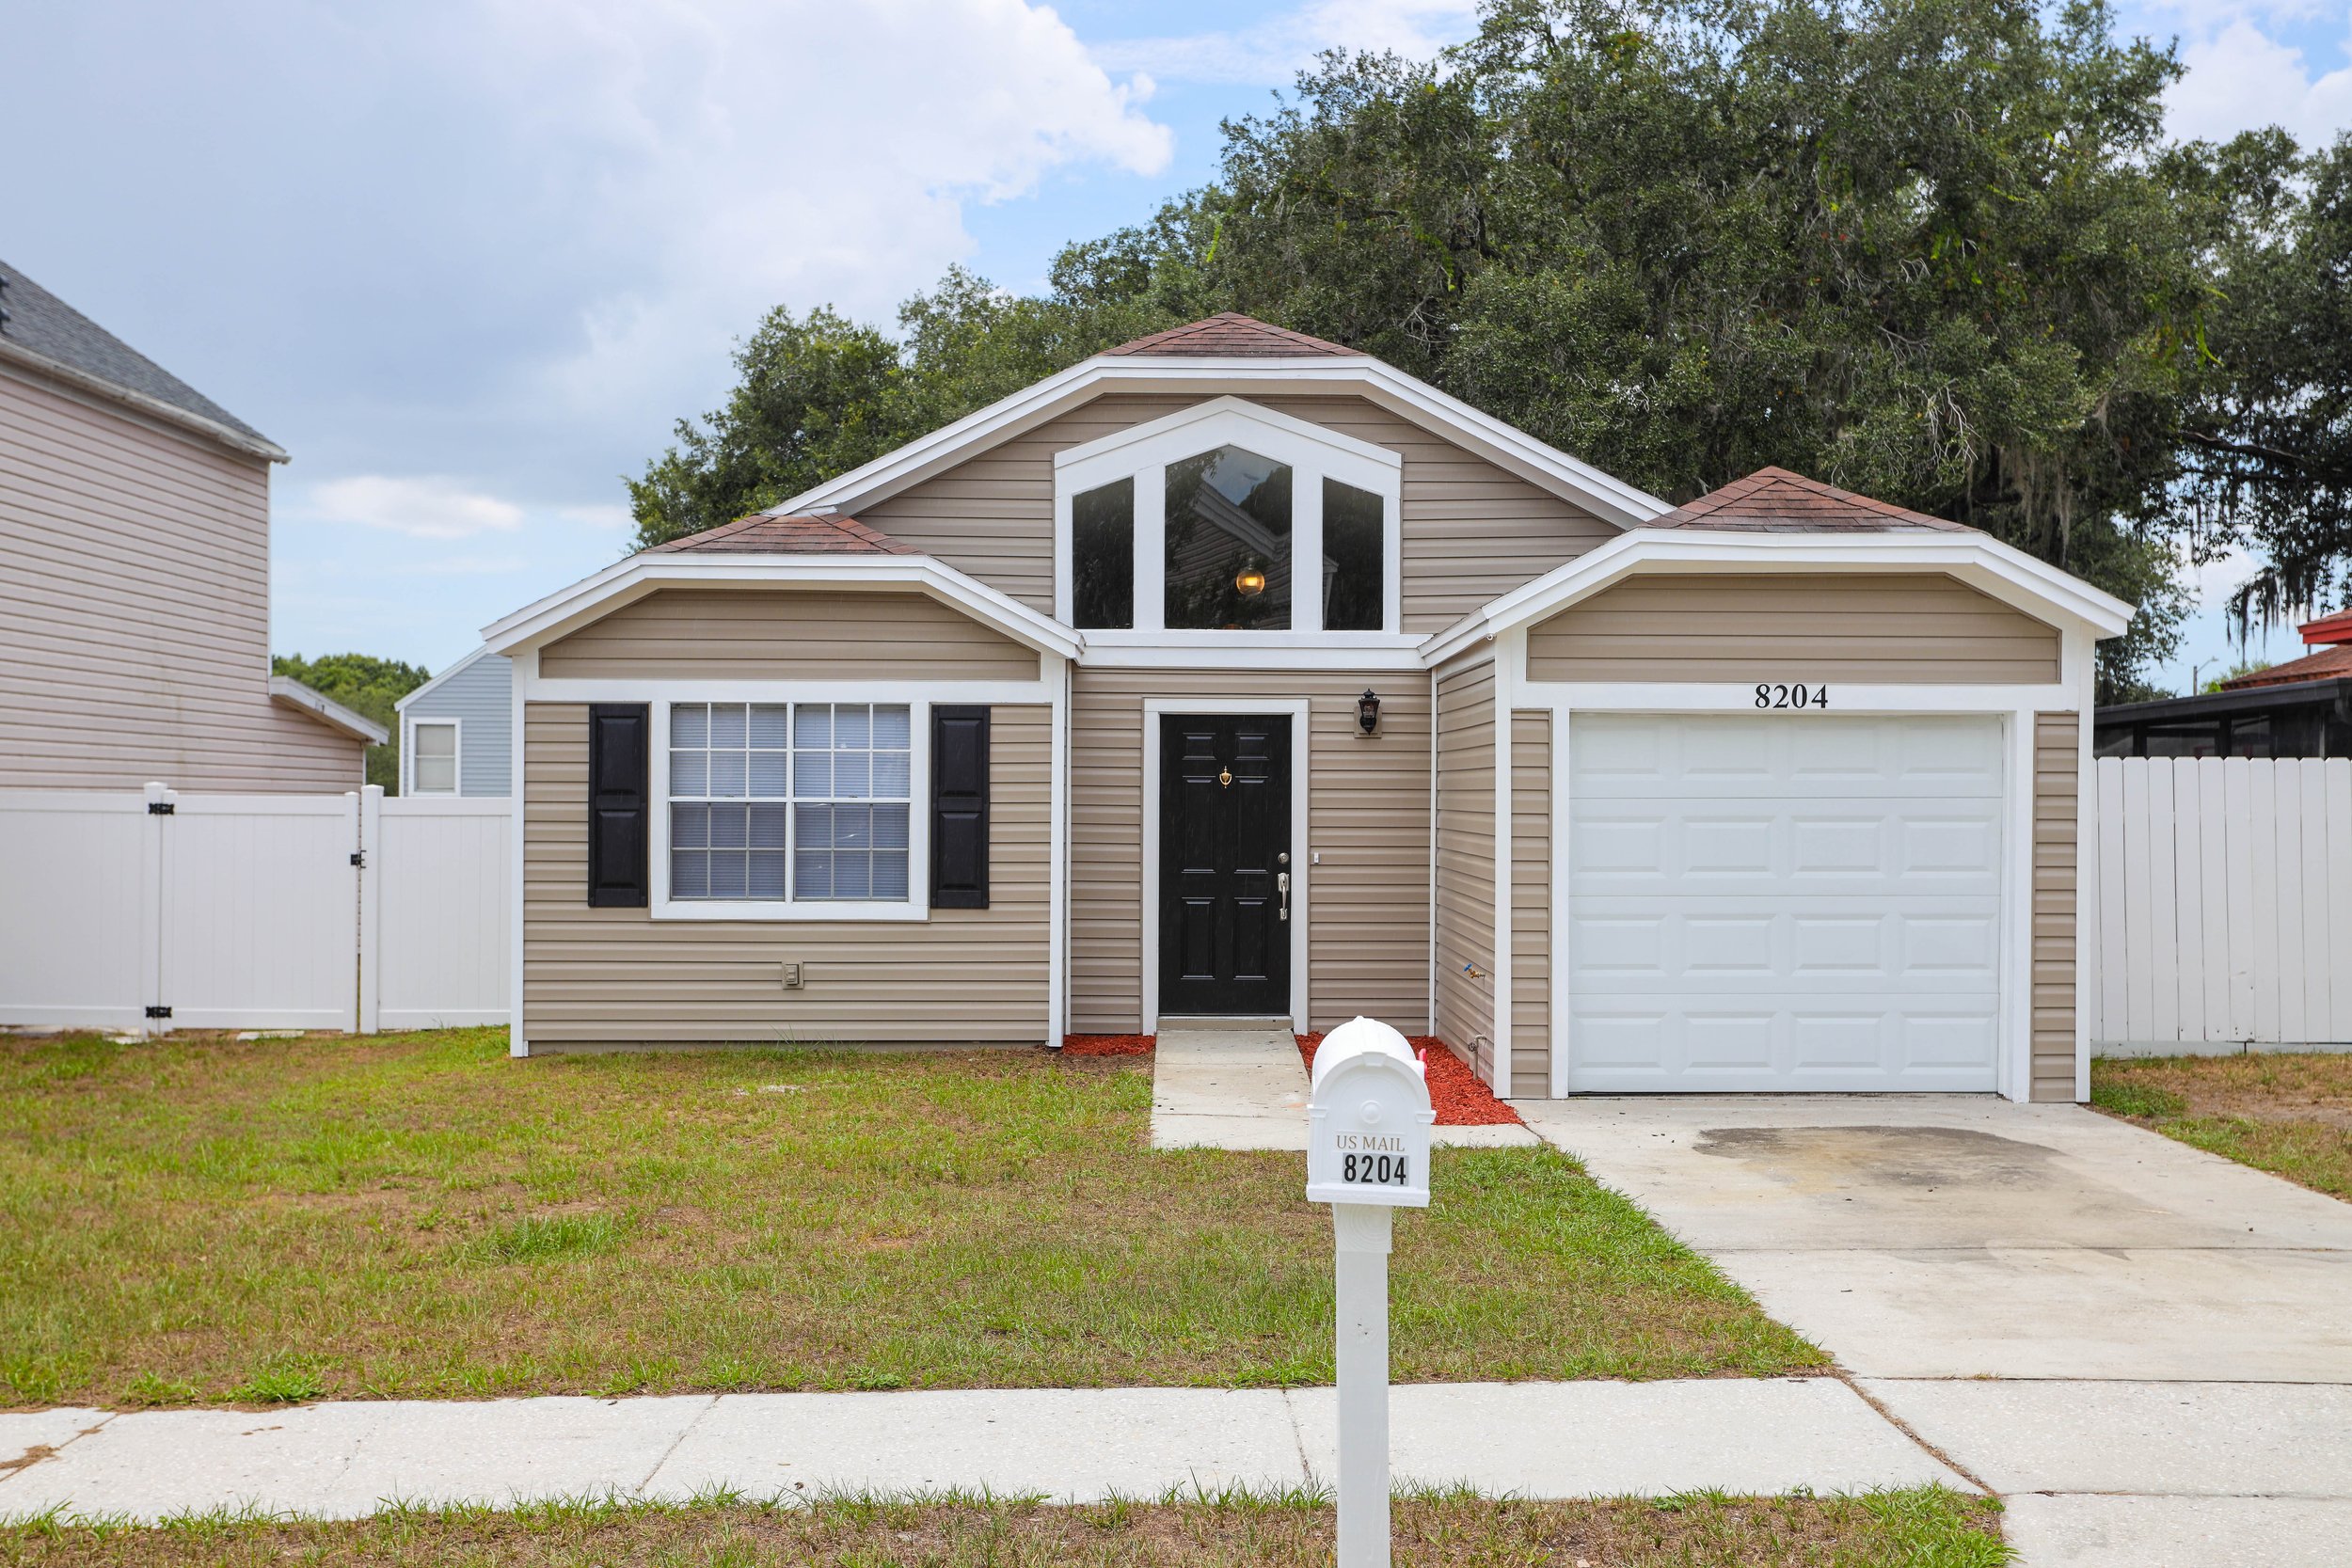
1.)Bathrooms and Kitchen - Remove personal items like toothbrushes, soap bottles and kitchen cleaning items. Decorative soap dishes can stay in the area but labeled soap bottles, toothpaste and toothbrushes can be stored until after.

For more information about Real Estate Listing Photography or other photography or video services reach out to Eric info@ntp2.com and make sure to follow on Social Media @NTP2Photography.